
How to Make a Sink Trap for Your Pottery Studio
What is a sink trap and why do I need one?
A sink trap is a device to capture all the clay and glaze sediment that you wash off your brushes, hands, tools in your pottery studio. Clay and glaze is sediment and heavier than water so everything that goes into your pipes potentially sits and stays there. A little clay going into your pipes isn’t too much of a worry but a build up over time could potentially cause an expensive blockage. You don’t want your sink backing up and not draining due to a big hunk of clay.
You can buy sink traps but they tend to be quite pricy and/ or take up a lot of room. But if you have the budget and are time poor then here are some examples of off the shelf solutions:
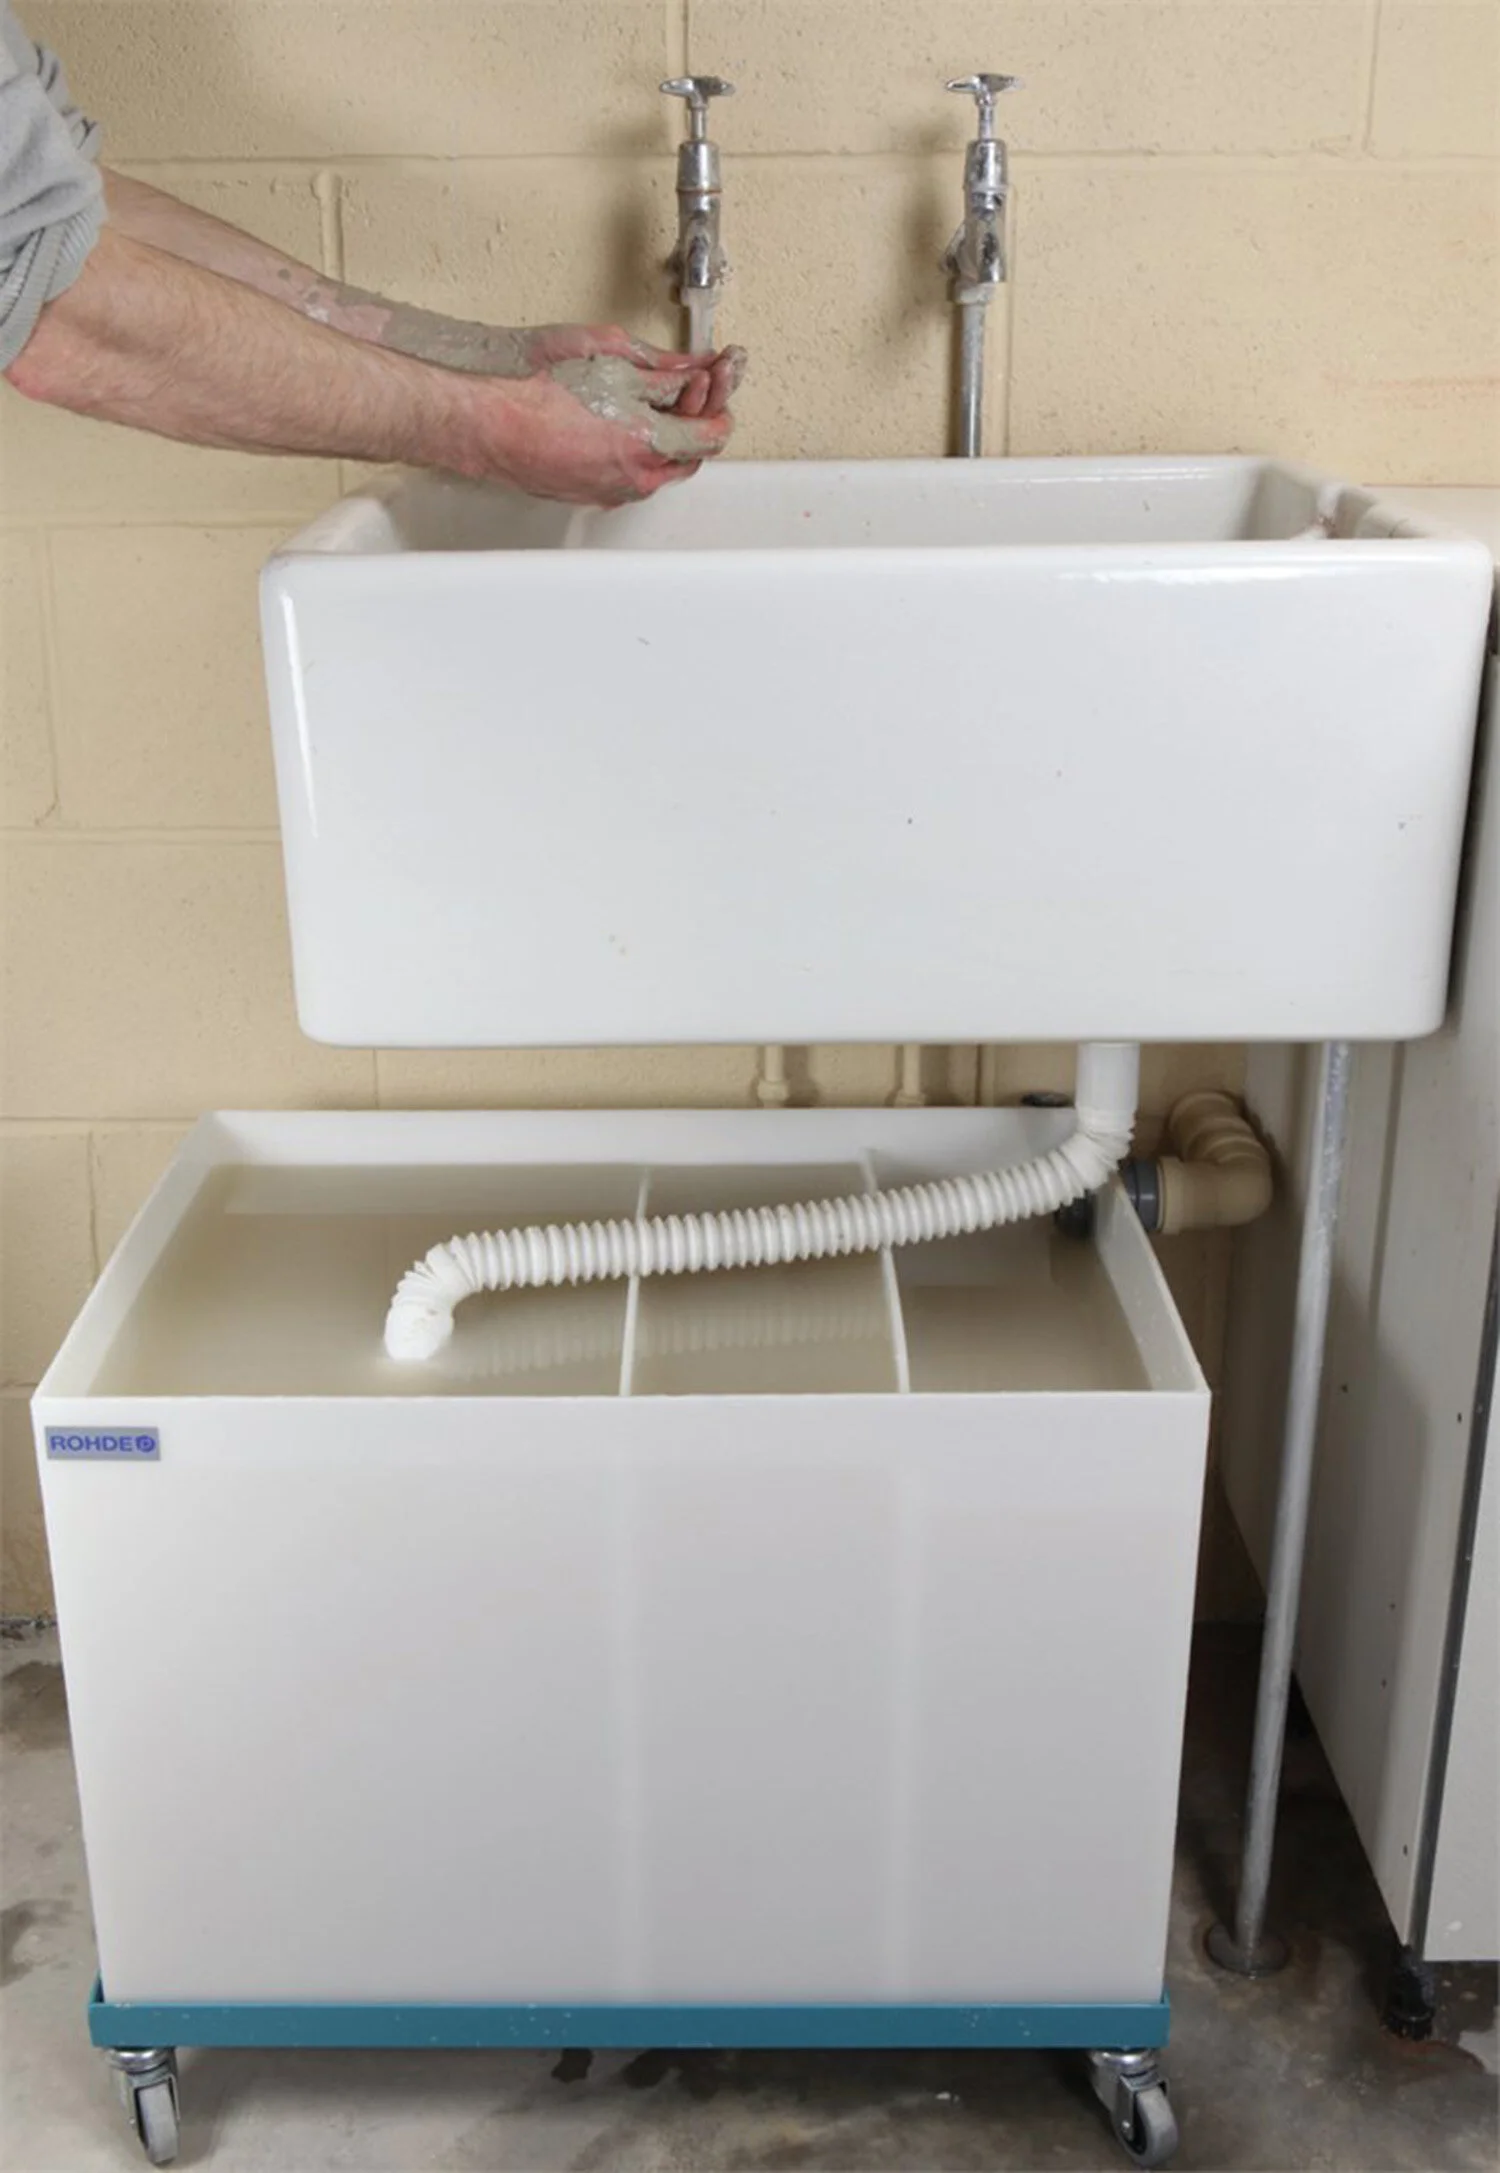
This Rohde Sediment Trap is an effective solution - great for larger community studios (it does take up a lot of room). It costs £420 (without the lid)
This GlecoTrap is much more space friendly but still pricey at £215 and it wouldn’t take very long for it to fill up in my studio.

How To Make Your Own Pottery Sink Trap…
If you are like me and have neither the space or the budget for either of the above options you might decided to make your own. A sink trap is a simple concept; wastewater (and clay) enters the containers from your sink, via gravity the water and solid particles are separated - the clay and glaze particles sink to the bottom - by the time it leaves the containers the water is free from any solids.
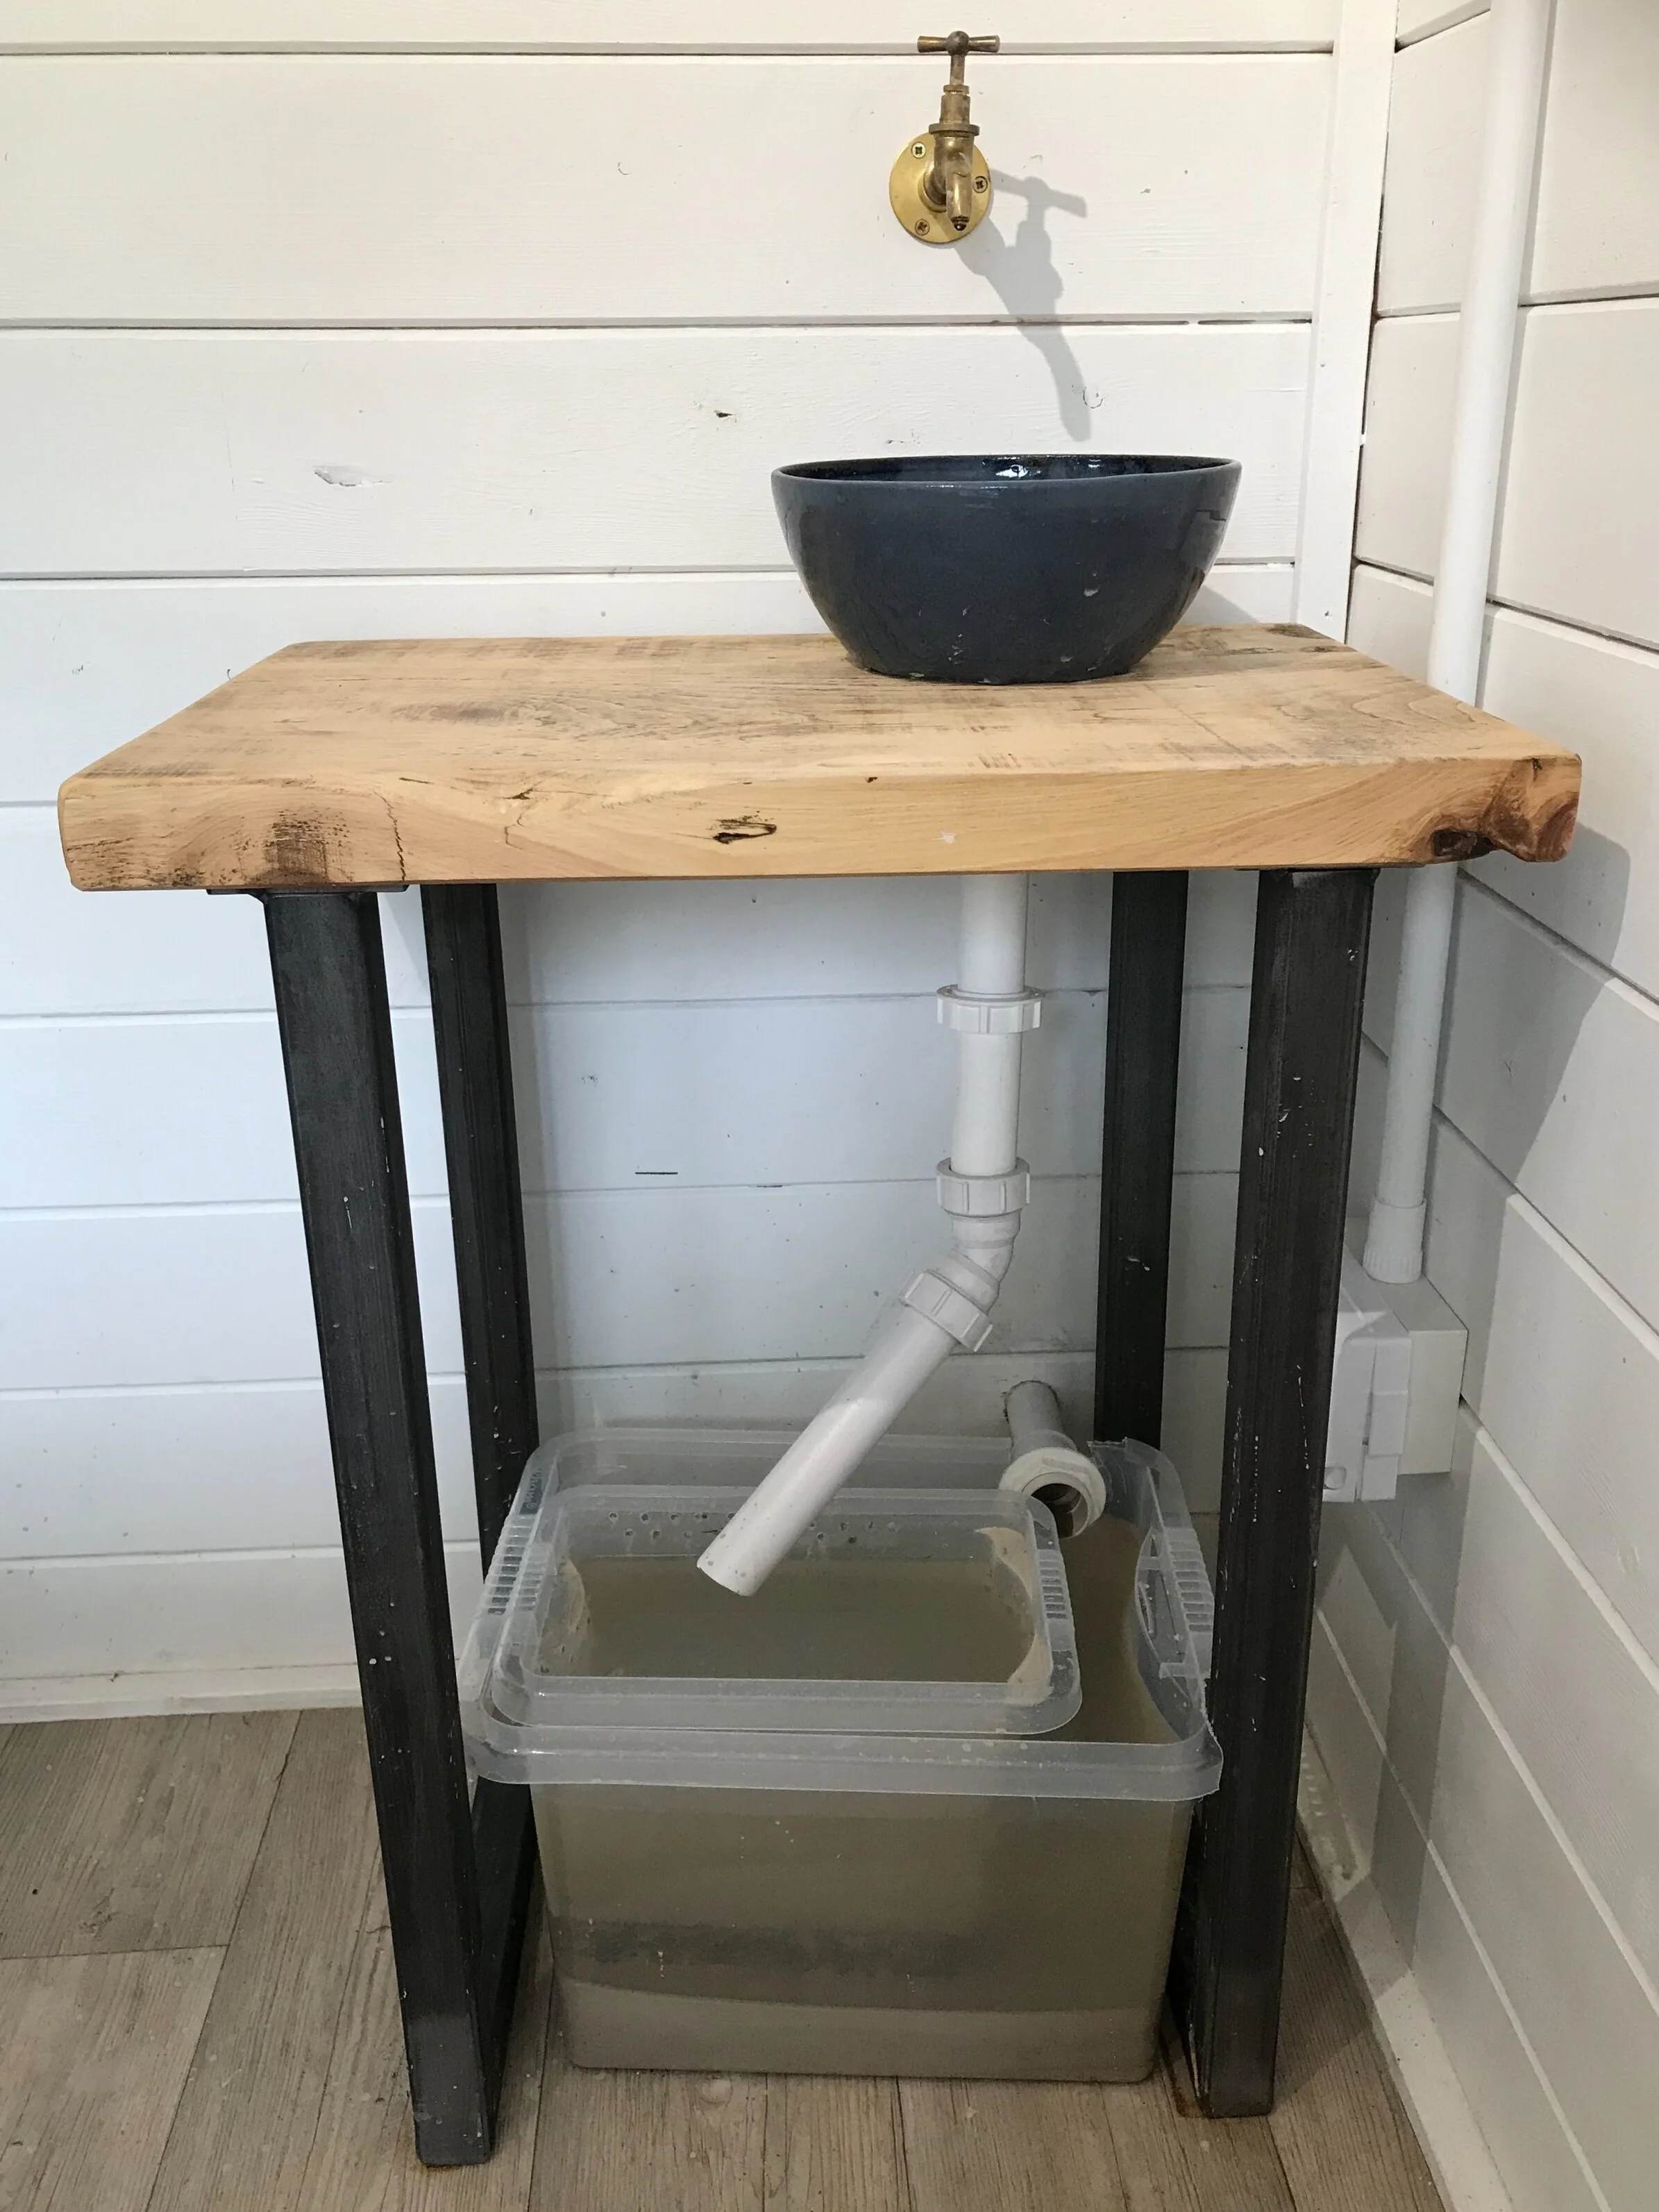
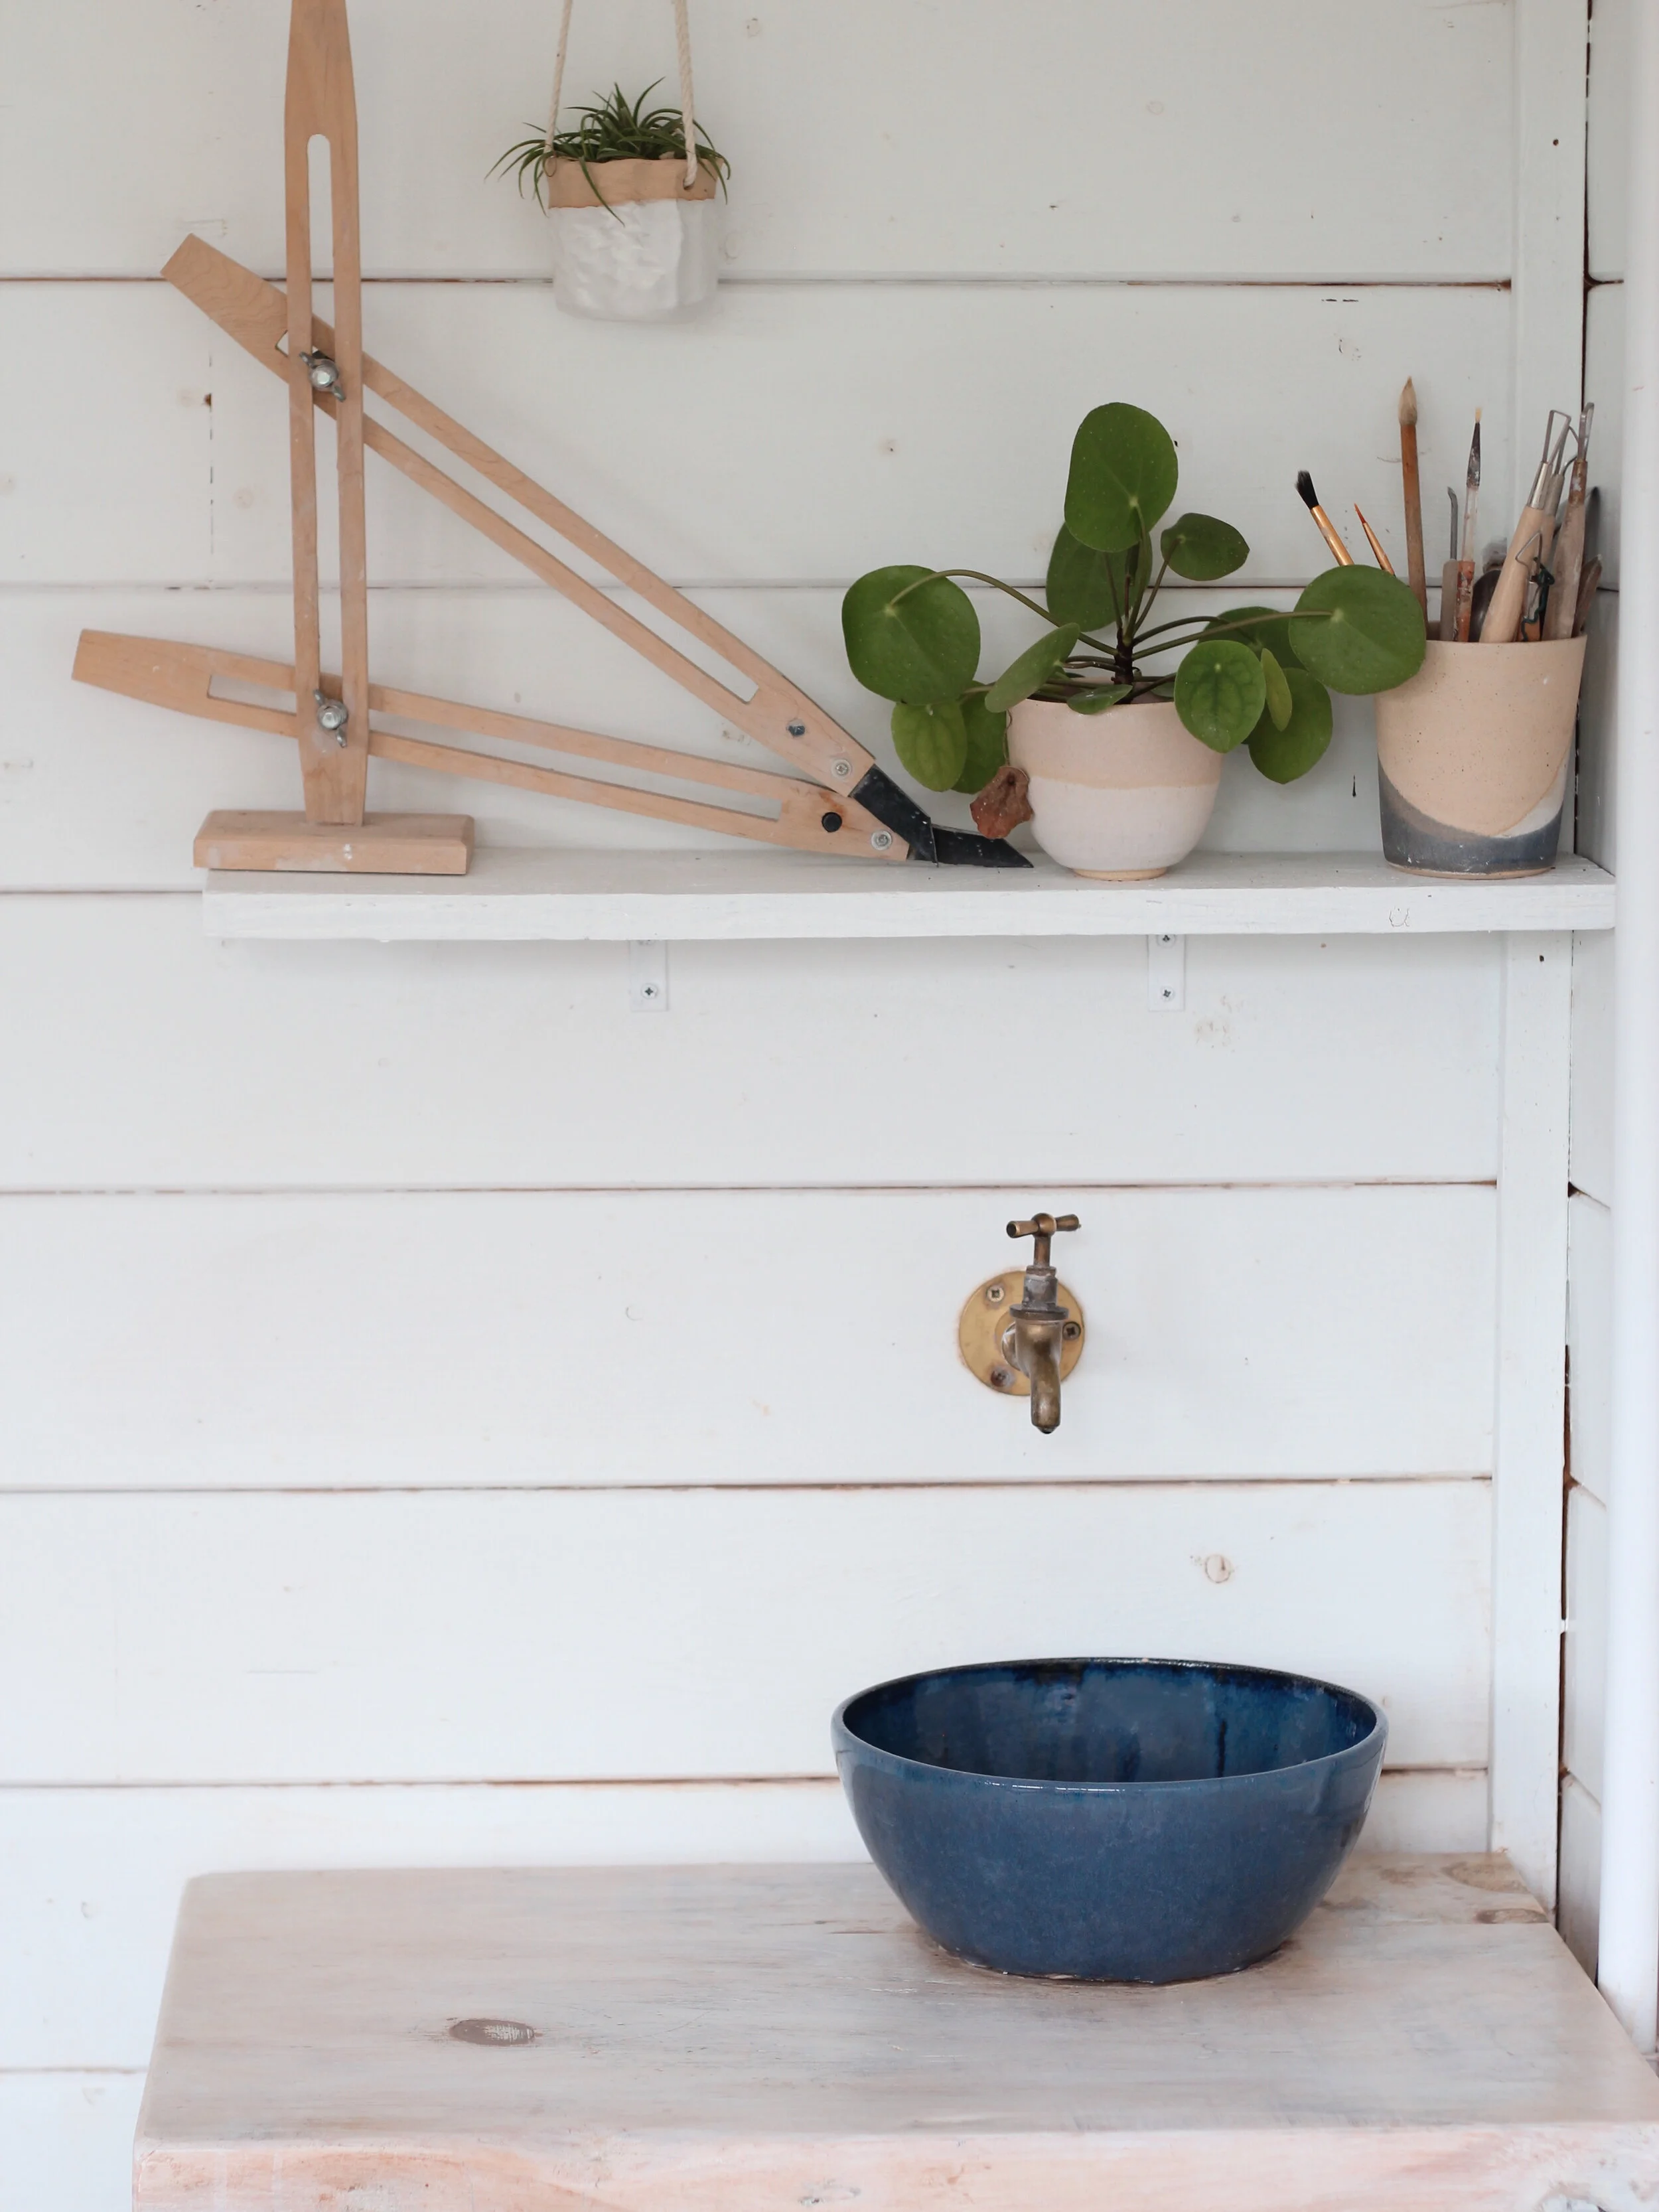
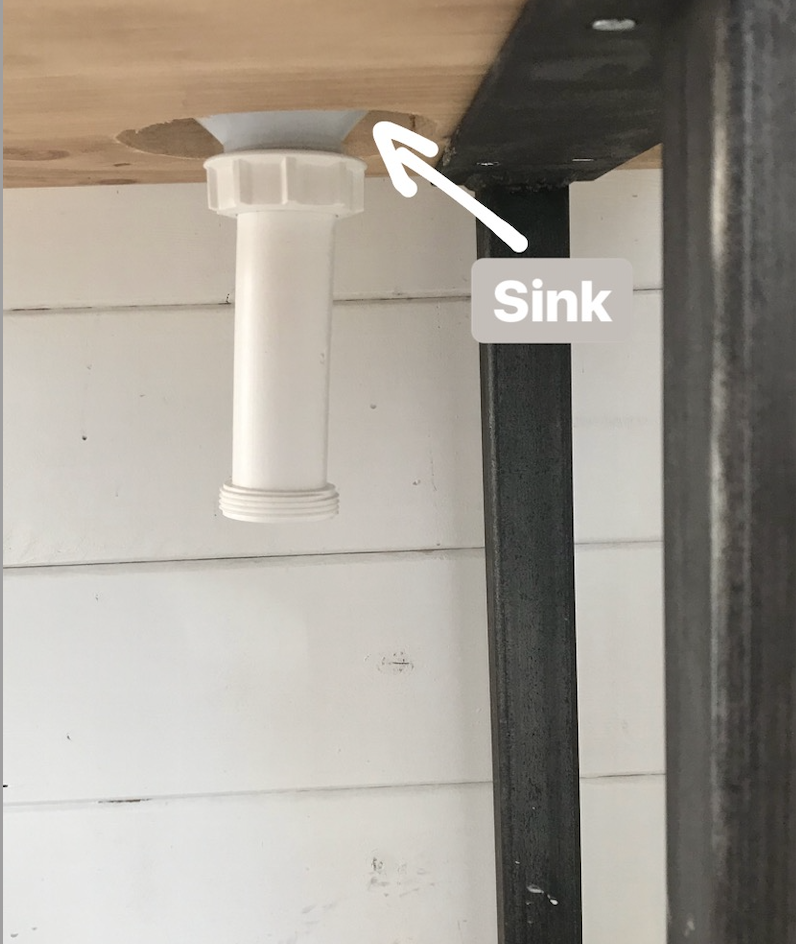
I knew I wasn't going to have a lot of space and wanted a sink to fit neatly in a corner so I made my own. It’s basically just a big bowl thrown on the wheel with a hole cut in the base for the plughole. It is important to know the shrinkage rate of your clay so your plughole fits snugly. The table was built from reclaimed wood and steel. I chopped out a hole into which my sink sits. The sink trap sits neatly under the table.
Here’s how I made my sink trap:
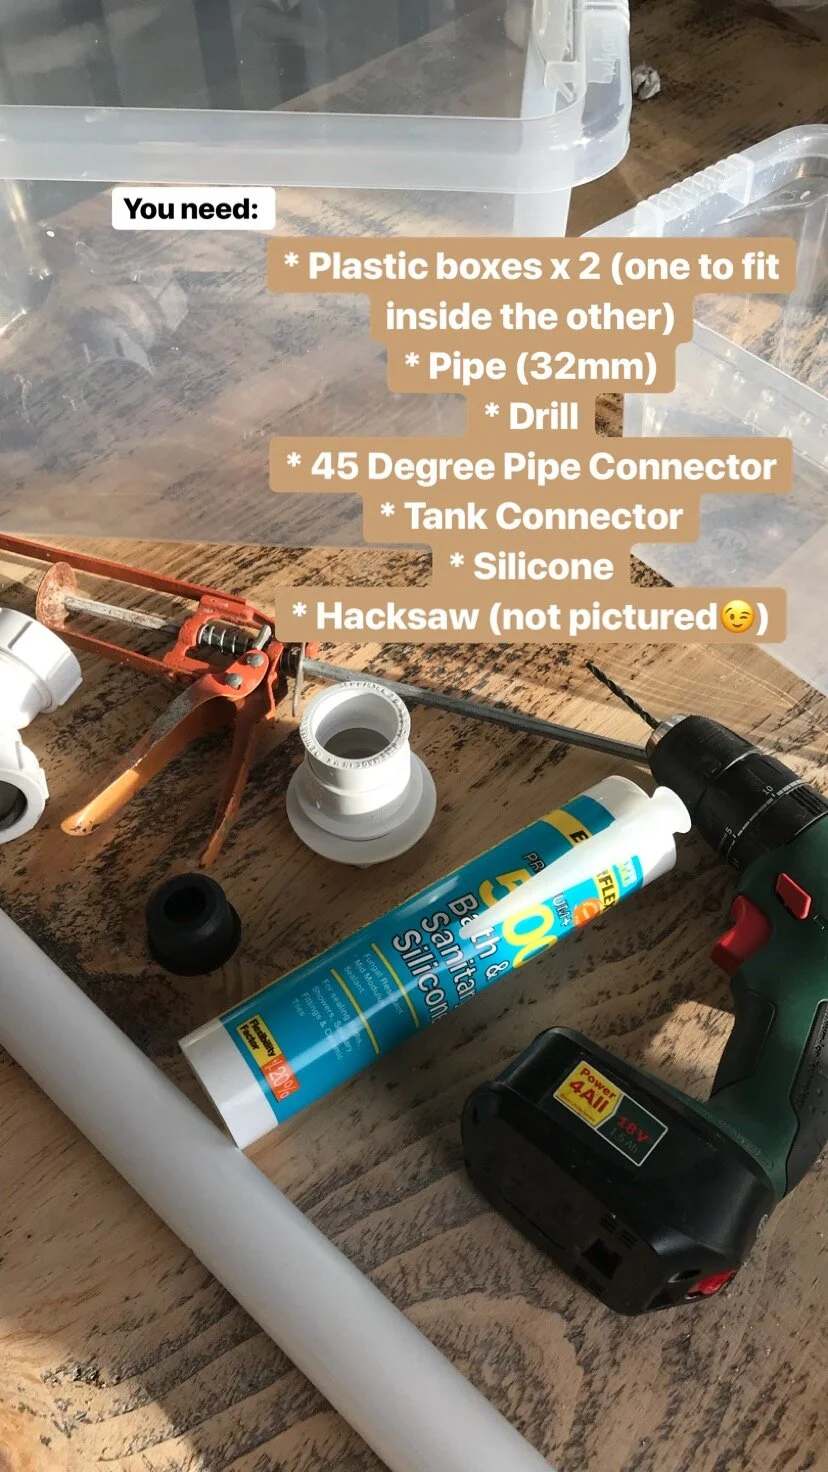
Tools and materials :
Two plastic tubs 1 x large 1 x smaller (the sizes I used: large tub 45 x 35 x 35cm, small tub: 25 x 15 x 20)
Plumbing pipe (32mm diameter) I needed 2 meters.
Drill 3mm drill bit
45 degree Pipe connector
Tank Connector
Bathroom silicone
Hacksaw
The main thing to consider is to make sure the pipes and holes line up with where you need them to be. The holes in the small container need to sit higher than where the exterior waste pipe flows out. Before drilling holes make sure you have worked out where they need to be. Make sure gravity is working on your side.
Step 1) Using your drill, make lots of small holes on all sides within 5cm of the top of your small plastic tub. The holes don’t need to be very big as only water needs to pass through them but they do need to be big enough that they won’t get blocked by clay over time. To prevent the plastic from splitting whilst drilling put masking tape on both sides where you are drilling.

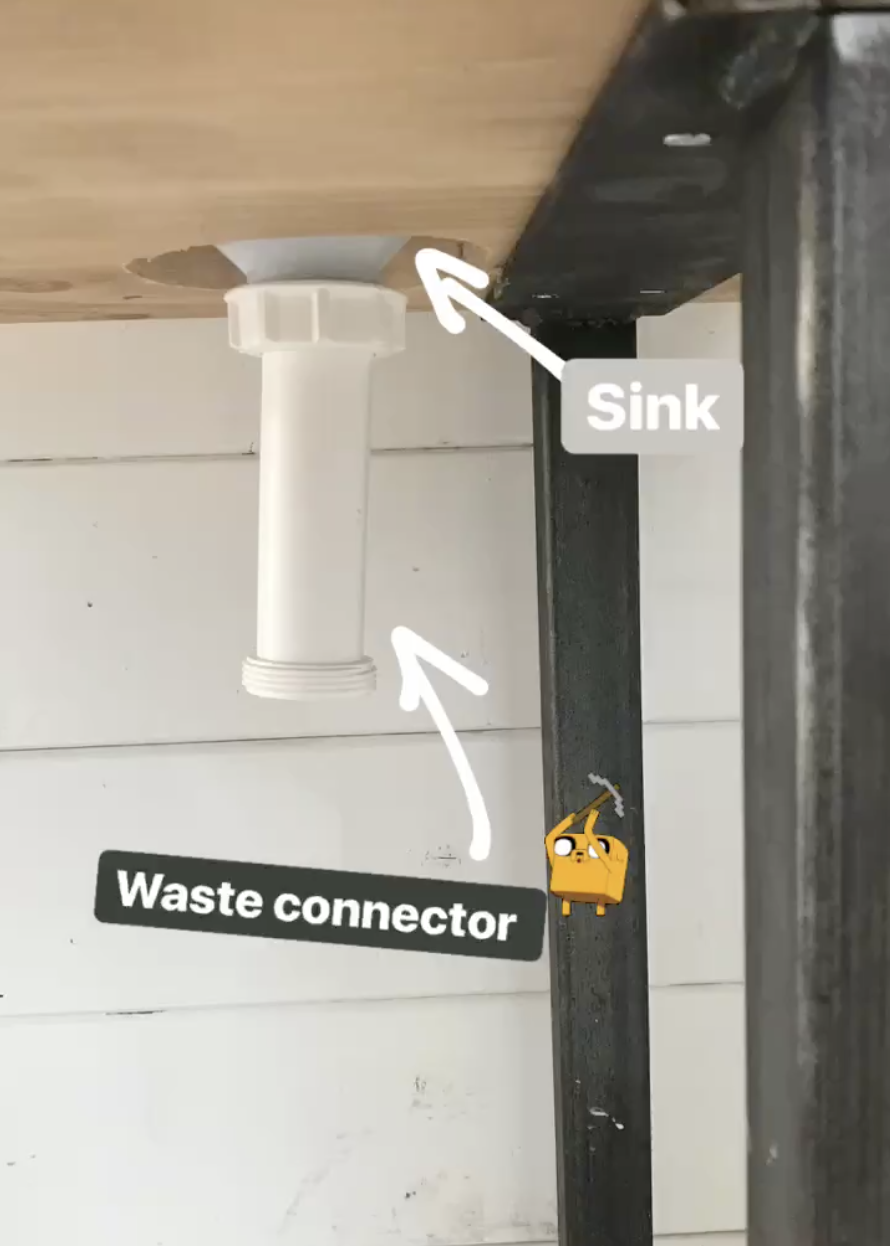
Step 2) I used standard 32mm pipes you can find in any plumbers merchant. Attach your pipes to your sink. Make sure the pipes line up with where you are going to place your plastic tubs. The waste pipe needs to flow into the middle of smaller tub. I asked the plumber who connected up my mains water to my studio to cut the whole for the waste pipe to go out into the garden. He used a 35mm holesaw drill bit.
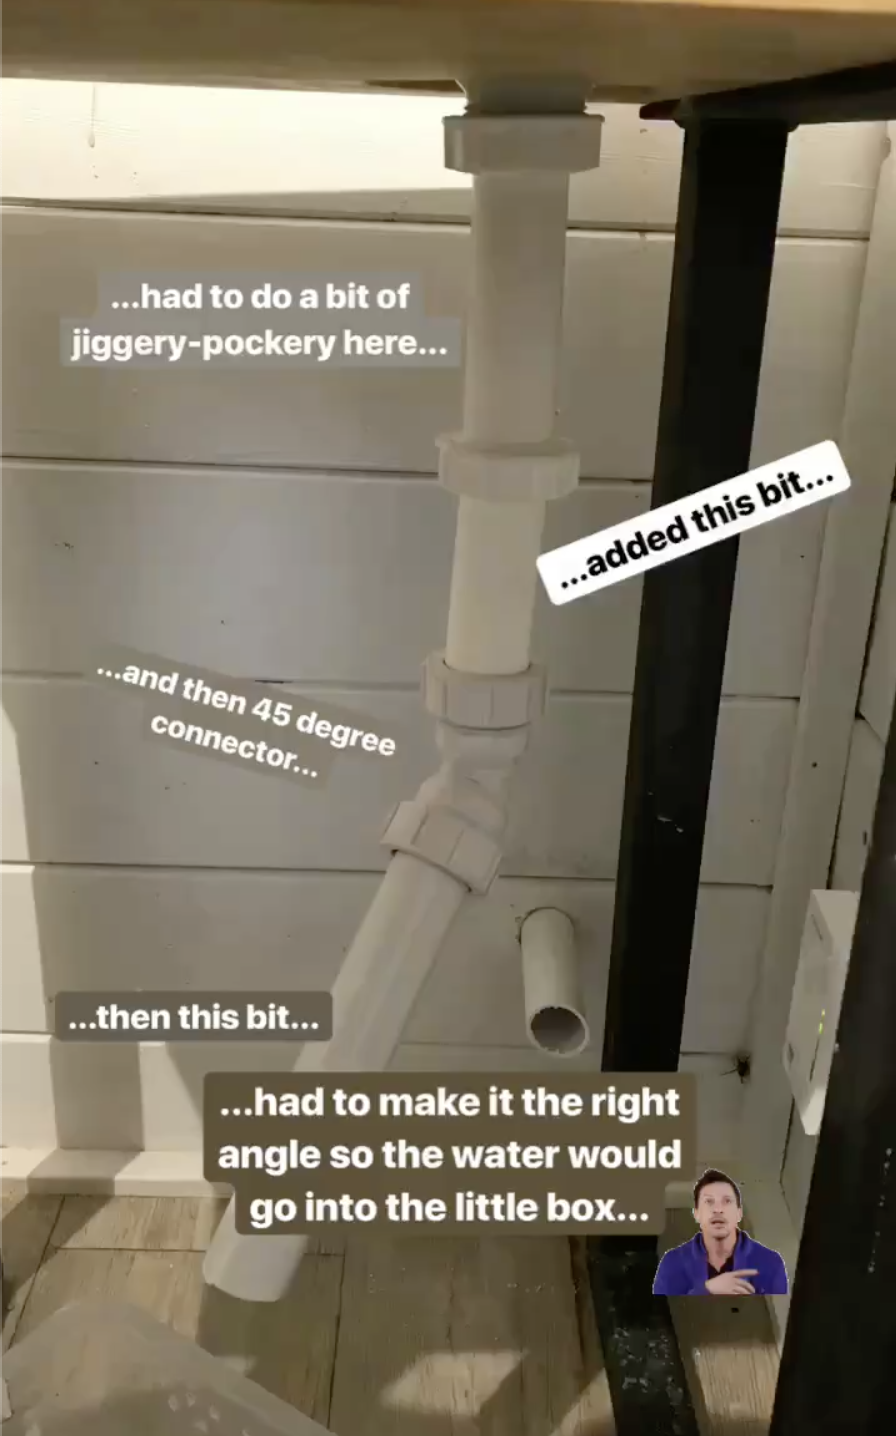
Step 3) I used a hacksaw to cut out a hole in the large tub where the tank connector will sit. The hole needs to be big enough for the 32mm pipe but small enough that the tank connector can grip the sides of the tub. Make sure you know where the external waste pipe will be - this needs to line up with the tank connector for it to attach easily. Carefully silicone around the edges of tank connector to make sure it is water tight and you don’t get any leaks.

Step 4) I placed the small tub inside the large tub. I needed to put my small tub on a brick to raise it up a little - the drilled holes need to sit above the level of the exterior waste pipe. I connected the exterior waste pipe onto the tank connector. The water from the sink flows into the small tub, out of the drilled holes and then into the large tub.The larger sediment settles on the bottom of the small tub and the smaller particles settle on the bottom of the larger tub. The water flows out of the waste pipe (mostly😉) clear. You can see the sediment at the bottom of the large tub in the picture.

Since making my sink trap, I’ve given it a bit of an upgrade. I replaced the large box with a slightly larger sturdier opaque plastic tub from Ikea. It has the option of casters which means once full I can roll it out and easily empty the content.

What do I do with the sediment when The sink trap needs emptying?
I’ll wait for a sunny day- so I can empty it outside - I’ll scoop out most of the sediment with a jug, put it on plaster batts and let it dry out completely until it’s hard - then I’ll dispose of it safely. I have heard of some people smashing it up, bisque firing it and then using it as aggregate for their garden (sounds like a lot of faff tho!) .
What if none of these sink trap options will work for me?
Don’t worry you can still work with clay even if none of these options work for you. Simply use the ‘Three Bucket System’ I wrote about that in earlier blog post ‘How to Create a Creative Space at Home’ you can read it here.
If you have any questions about sink traps pop them in the comments below…
Kara x
PS If you enjoy my blog, find it helpful or inspiring - take a moment to consider joining my Pottery Club.
My Pottery Club is a place where I share - real time video pottery tutorials, lessons and learnings from my 15 Years of potting, PLUS limited edition work and seconds sales and in return you will be supporting your fav artist 😉 You can join and support my work from as little at £3.50 per month - meaning I can write more helpful posts like this - I’d love to see you there!